Learning PHP, part 2
Let's learn the very basics of the PHP language syntax
By: Ajdin Imsirovic 18 November 2019
Let’s learn some basics of PHP syntax. These will include comments, types, operators, functions, arrays, objects, and classes.
 Image by
codingexercises
Image by
codingexercises
Comments in PHP
There are three types of comments in PHP:
# C-style one-line comment
// double-slash one-line comment
/*
multi-line
comment starts
with slash and asterisk
and ends with
asterisk and slash
*/
Comments simply get ignored when the code is ran. That’s why they’re great for two things:
- documenting notes related to code
- Temporarily commenting-out sections of code (such as when debugging code and trying different solutions - if the solution doesn’t work, but you want to keep the code for some reason, you can simply comment it) - effectively, this is also a kind of documentation
Let’s see this in practice by writing a simple app in PHP and running it on our machine.
Writing a simple app in PHP
The simplest possible app that we can write in PHP is a one-liner app:
<?php phpinfo(); ?>The phpinfo() function is built into the PHP language. That means that we don’t have to define it; it’s already defined in the language itself.
If it wasn’t defined, we’d have to define it like this:
function phpinfo() {
	// some code here
}
It helps to think of functions as machines. To run the machine, we add parentheses, (), at the end of the “machine” name. To remember this easier, we can imagine that the () is a button that will start our machine. All together, we run the machine, that is “call the function”, like this:
someFunctionName();In PHP, at the end of each line, we need to add a semi-colon character, ;. It helps to think of it like how in English, a sentence isn’t complete until we add it a comma at the end.
Let’s now save our one-liner app in a new folder. We’ll call this folder first-php-app, and we’ll add a new file to it, called index.php. Here are the commands to do this in Ubuntu 18.04:
cd ~/Desktop
mkdir first-php-app
cd first-php-app
touch index.php
nano index.php
You don’t have to use the nano editor; i.e you don’t have to call the last line we used. Since we’ve installed Sublime Text 3 in the first article of our article series, you can just open the index.php file in sublime, like this:
sublime index.php
Regardless of whether we’re using nano, Sublime, or some other text editor, once it’s open, we can run it, by simply opening our browser of choice and dragging and dropping the index.php file from the file system onto the browser window.
Alternatively, you can install the chromium browser, then run the index.php file straight from the command line, using the following command:
chromium index.php
Once we’ve ran the above command, the browser’s address bar will show this address:
file:///home/phpuser/Desktop/first-php-app/index.php
…aaand, the browser will download the index.php file.
Why is this happenning?
To understand this problem, we’ll take a short detour and look at using html files in the browser, so let’s make a new html file:
touch test.html
subl test.html
Inside the test.html file, we’ll add the usual HTML content:
<!DOCTYPE html>
<html lang="en">
<head>
	<meta charset="UTF-8">
	<meta name="viewport" content="width=device-width, initial-scale=">
	<title>Test</title>
</head>
<body>
	<h1>This is a test.</h1>
</body>
</html>
After saving the above code, we can close our test.html, then run it in the Chromium browser:
chromium test.html
This time, everything works as expected. The browser loads the test.html file by opening this address:
/home/phpuser/Desktop/first-php-app/test.html
So why does this work with the HTML file, but it doesn’t work with the PHP file?
Because PHP files are not understood by the browser.
PHP files are server-side code; HTML files are client-side code.
This means that PHP files can be run on the server, and HTML files can be run in the browser.
Thus, for our php file to run as we expected, we need to set up this server, and run it.
Luckily, we’ve already done this in the previous article in this article series. Now we just need to verify that everything works, and possibly add a few tweaks.
Setting up the server
Let’s first check the status of our Apache server:
sudo service apache2 status
Here is the output:
phpuser@pc:~/Desktop/first-php-app$ sudo service apache2 status
[sudo] password for phpuser:
● apache2.service - The Apache HTTP Server
   Loaded: loaded (/lib/systemd/system/apache2.service; enabled; vendor preset: enabled)
  Drop-In: /lib/systemd/system/apache2.service.d
           └─apache2-systemd.conf
   Active: active (running) since Wed 2019-11-18 16:49:20 CEST; 17h ago
 Main PID: 23274 (apache2)
    Tasks: 6 (limit: 4525)
   CGroup: /system.slice/apache2.service
           ├─23274 /usr/sbin/apache2 -k start
           ├─23276 /usr/sbin/apache2 -k start
           ├─23277 /usr/sbin/apache2 -k start
           ├─23278 /usr/sbin/apache2 -k start
           ├─23279 /usr/sbin/apache2 -k start
           └─23280 /usr/sbin/apache2 -k start

Jul 01 16:49:20 pc systemd[1]: Starting The Apache HTTP Server...
Jul 01 16:49:20 pc apachectl[23270]: AH00558: apache2: Could not reliably determine the server's full
Jul 01 16:49:20 pc systemd[1]: Started The Apache HTTP Server.
lines 1-18/18 (END)
There’s a firewall on Ubuntu called UFW firewall. We need to ensure that our Apache server is listed in the app list of UFW application profile, so let’s run:
sudo ufw app list
Here’s the above command and its output:
phpuser@pc:~/Desktop/first-php-app$ sudo ufw app list
Available applications:
  Apache
  Apache Full
  Apache Secure
  CUPS
Let’s now inspect the Apache Full profile, with:
sudo ufw app info "Apache Full"
This returns:
Profile: Apache Full
Title: Web Server (HTTP,HTTPS)
Description: Apache v2 is the next generation of the omnipresent Apache web
server.

Ports:
  80,443/tcp
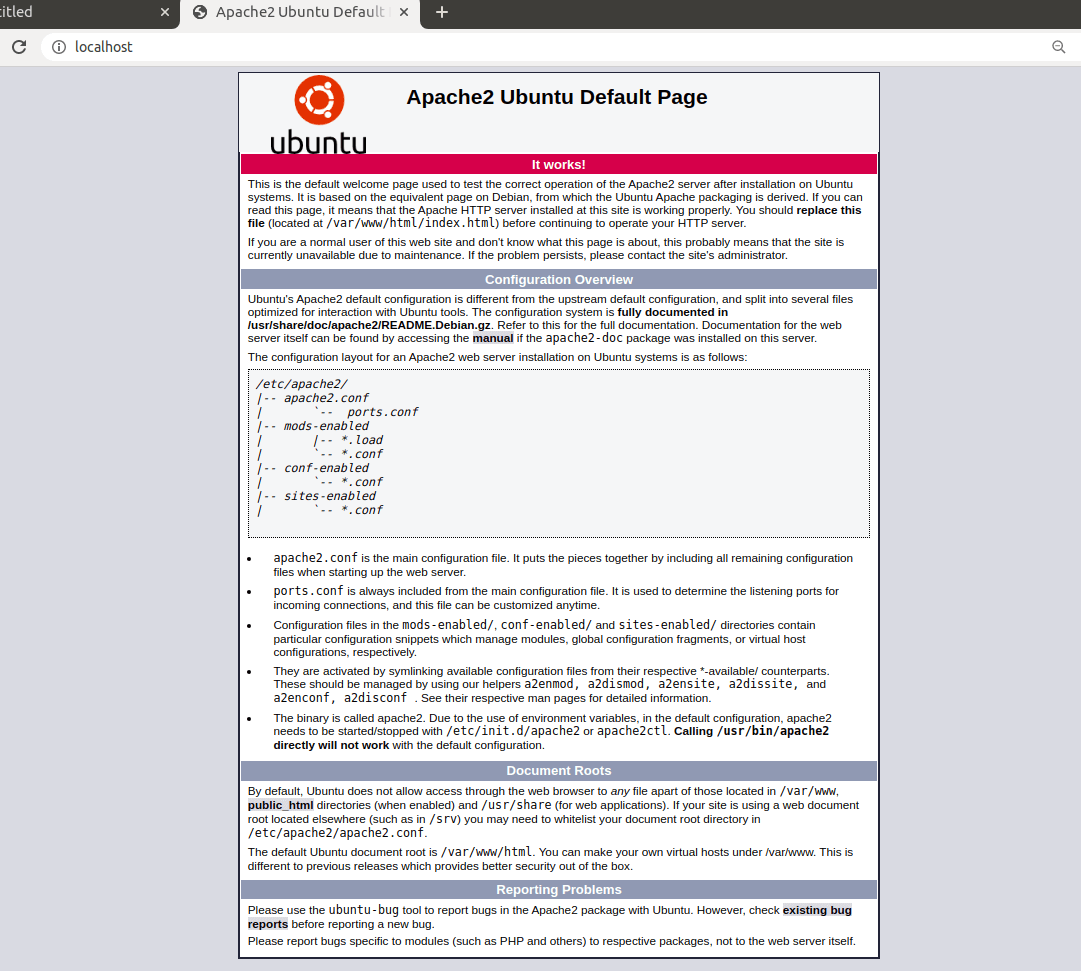
Great, everything seems to be working fine.
We can now go to the localhost address in the browser, and find this:
To allow http(s) traffic on Apache Full profile, run:
sudo ufw allow in "Apache Full"
Here’s the command and the output:
phpuser@pc:~$ sudo ufw allow in "Apache Full"
[sudo] password for phpuser:
Rules updated
Rules updated (v6)
Adding our php app to Apache web root
Initially, we saved our mini app on the desktop. That was a mistake; we should have saved it in the web root of our Apache server at /var/www/html/.
So let’s move the existing folder to the web root folder, like this:
sudo mv ~/Desktop/first-php-app /var/www/html/
Let’s now inspect our /var/www/html/ folder:
cd /var/www/html;
ll
Here are the above commandsd and the output:
phpuser@pc:~/Desktop$ cd /var/www/html
phpuser@pc:/var/www/html$ ll
total 24
drwxr-xr-x 3 root    root     4096 Jul  2 12:28 ./
drwxr-xr-x 3 root    root     4096 Jul  1 16:48 ../
drwxr-xr-x 2 phpuser phpuser  4096 Jul  2 10:24 first-php-app/
-rw-r--r-- 1 root    root    10918 Jul  1 16:49 index.html
Making php files the preferred folder files to load
Any server serves files from directories. In case we point our browser to a directory that is public (i.e open to the web), and don’t specify the file name, the server will serve index.html by default (if such a file exists).
We want to override that behavior and instead serve index.php.
To do that, we’ll need to first navigate to the Apache server folder on our Ubuntu, like this:
cd /etc/apache2/
Let’s see the file structure by running the ll command:
phpuser@pc:/etc/apache2$ ll
total 96
drwxr-xr-x   8 root root  4096 Jul  1 16:49 ./
drwxr-xr-x 130 root root 12288 Jul  2 10:13 ../
-rw-r--r--   1 root root  7224 Mar 13 13:26 apache2.conf
drwxr-xr-x   2 root root  4096 Jul  1 17:05 conf-available/
drwxr-xr-x   2 root root  4096 Jul  1 16:49 conf-enabled/
-rw-r--r--   1 root root  1782 Jul 16  2019 envvars
-rw-r--r--   1 root root 31063 Jul 16  2019 magic
drwxr-xr-x   2 root root 12288 Jul  1 16:49 mods-available/
drwxr-xr-x   2 root root  4096 Jul  1 16:49 mods-enabled/
-rw-r--r--   1 root root   320 Jul 16  2019 ports.conf
drwxr-xr-x   2 root root  4096 Jul  1 16:49 sites-available/
drwxr-xr-x   2 root root  4096 Jul  1 16:49 sites-enabled/
Now we’ll need to edit the dir.conf file, located inside the mods-enabled file.
sudo nano mods-enabled/dir.conf
Basically, this file lists the preference of files to be open when a directory is accessed from the browser. Notice that currently index.html is first in the list:
<IfModule mod_dir.c>
        DirectoryIndex index.html index.cgi index.pl index.php index.xhtml index.htm
</IfModule>

# vim: syntax=apache ts=4 sw=4 sts=4 sr noet
All we need to do to make the index.php the first file that the server will try to serve is to swap the index.html file with the index.php file, so that our updated dir.conf file now looks like this:
<IfModule mod_dir.c>
        DirectoryIndex index.php index.cgi index.pl index.html index.xhtml index.htm
</IfModule>

# vim: syntax=apache ts=4 sw=4 sts=4 sr noet
For our changes to take effect, we’ll restart the Apache server:
sudo systemctl restart apache2
Now let’s try loading the mini app we built, by visiting this address in our browser:
localhost/first-php-app/
We can do it from command line, by running this:
chromium localhost/first-php-app/
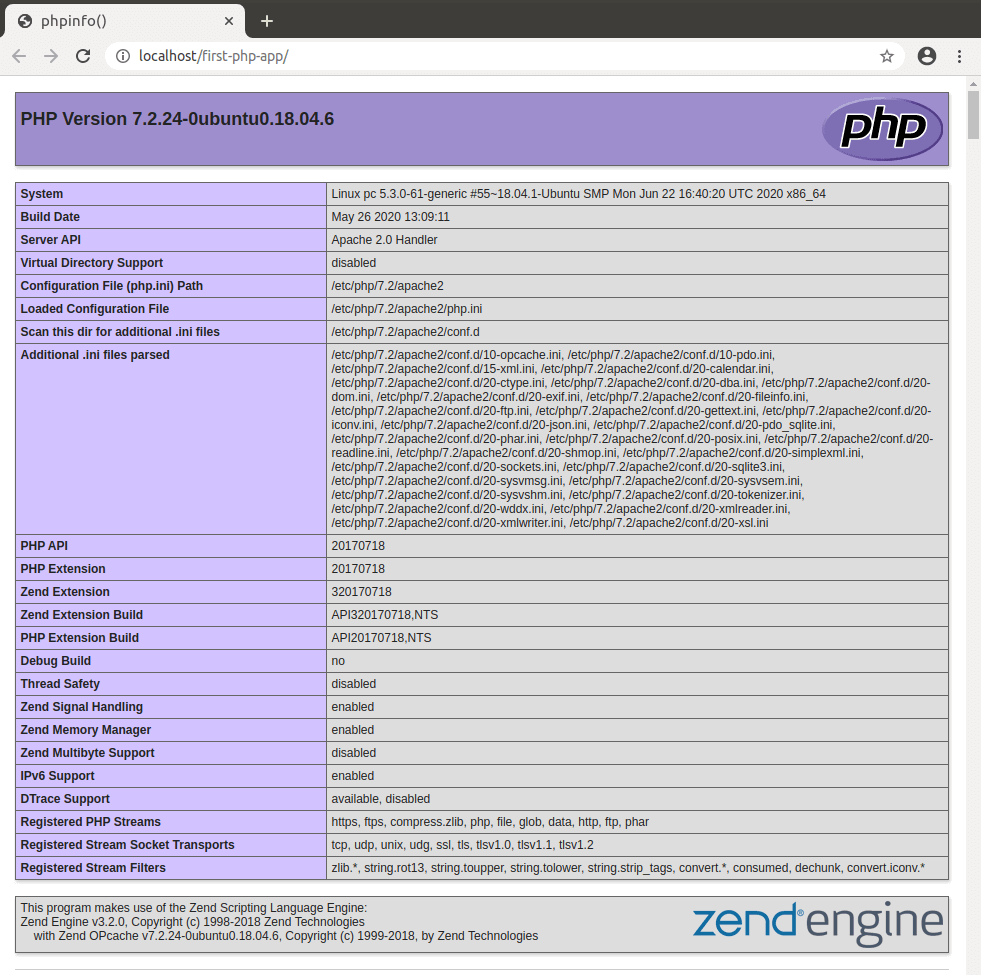
Now that we have successfully set up our PHP on Apache server, we can learn more about PHP itself and see how it executes in the browser.
Types in PHP
Let’s now update our file to something better than just outputing some information from a built-in PHP function.
Let’s start by assigning a value of type integer to a variable, and then displaying it on the screen in the browser.
Integer
Here’s the updated code:
<?php
	$integer = 100;
	echo "The number is $integer";
?>
If you’re a bit confused with the above syntax, please check out our discussion of variable assignment in php.
To update our index.php, we can run:
subl /var/www/html/first-php-app/index.php
Now we can re-open the file in our browser, like this:
chromium localhost/first-php-app/
Now we’ll get this sentence displayed on the screen:
The number is 100
Sidenote: running our page like this, will throw an error in the browser:
chromium /var/www/html/first-php-app/
Let’s now list out all the data types that php has:
- string
- integer
- float (i.e floating point number, or double)
- boolean
- array
- object
- null
- resource
Let’s now extend our app so that it displays various different data types. We can easily inspect the type of data a variable holds by using the build-in var_dump() function. Let’s update our app to see it in practice:
<?php

	$integer = 99;

	var_dump($integer);

?>
Let’s save our changes and refresh the page in our browser. Here’s the new output:
int(99)
Obviously, the int keyword stands for “integer”, and the value is inside the parentheses.
Float
Let’s add a float:
<?php

	$integer = 99;

	var_dump($integer);

	$float = 1.234;

	var_dump($float);
?>
Now our output is:
int(99) float(1.234)
Boolean
Let’s add the booleans, with both values, true and false:
<?php

	$integer = 99;

	var_dump($integer);

	$float = 1.234;

	var_dump($float);

	$bool1 = true;
	$bool2 = false;

	echo "<hr><br> $bool1, $bool2";

	var_dump($bool1, $bool2);
?>
Casting values to booleans
We can also cast (covert) other values to booleans, using the following syntax:
<?php

	$float = 1.234;
	var_dump((bool)$float);

?>
Now the var_dump() function will show true because the variable $float did hold a value. If it didn’t hold a value (like an empty string or null), or if it had the value of 0, the converted value would be false:
<?php

	$test1 = 0;
	var_dump((bool)$test1);
	$test2 = "";
	var_dump((bool)$test2);
	$test3 = null;
	var_dump((bool)$test3);

?>
After updating the index.php file as above and refreshing the change, we’d get this output:
bool(false) bool(false) bool(false)
Declaring constants
To declare a constant in php, we use the define() function. We pass it two parameters:
- the name of the constant
- the value of the constant
To see it in practice, let’s update our index.php with the following code:
<?php

	define("PI", 3.1415);
	var_dump(PI);

?>
The output is:
float(3.1415)
In PHP, constants are global, meaning, they are accessible from anywhere in our app.
Determining the types of variables in php
To determine the types of variables in php, we have the following functions at our disposal:
# for booleans
is_bool();

# for ints
is_int();

# for strings
is_string();

# for floats
is_float();
We can run a variable through a test to see if it’s of a given type. The test is simple: we just pass our variable to one of the above functions, for example:
<?php

	$var = "abcd";

	echo is_string($var);

	echo "<br><hr>";

	echo is_int($var);

	echo "<br><hr>";

	echo is_bool($var);

?>
Let’s save the above code in a file titled typecheck.php, and run it in browser by pointing it to:
localhost/first-php-app/typecheck.php
If we open our browser at this address: localhost/first-php-app/typecheck.php, we’ll get only the number 1 printed on the screen, followed by two line breaks and two horizontal lines (the <hr> element).
What does this mean? It means that all the above listed type-checking methods either return a 1 (if true), or nothing.
Checking if a constant is defined in php
Let’s make another file; we’ll call this one definedconstants.php:
<?php

	define('PI', 3.1415);

	// Remember to put the constant name in quotes!
	echo defined('PI'); # 1

	// Remember to put the constant name in quotes!
	echo defined('PIES'); # no output

?>
The output on the screen, after running the above file, will be just 1.
Operators in PHP
There are several kinds of operators in PHP. To make it easier to remamber, we can arrange them into a word, where each letter of the word is the first letter of the operator name. Thus, we get the words Mc Islands:
- Mathematical operators
- Comparison operators
- Incrementing operators
- String operator
- Logical operators
- Assignment operators
- Null coalesce operator
- Decrementing operators
- Spaceship operator
We’ll start with the assignment operators, because they are the most basic concept to understand when coding in any language.
However, before we even start writing coding exercises to explain operators in php, we’ll take a slight detour and prepare for the inevitable situation: while we write our code and save it in php files, we might often make some mistakes that will result in our code being broken. Very often, these are just typos. We probably forgot to add a semi-colon at the end of a line, or we forgot to delete some characters. It’s usually simple errors like this that result in our php web page failing silently.
When such a thing happens, the first thing we need to do is to get to the root cause of the silent failure, and the best way to do it is to examine the last few lines of the error log, using this command:
sudo tail -f /var/log/apache2/error.log
Make sure to remember this command, we’ll likely need it at least a few times before the end of this article.
Now we can start going through the operators.
Assignment operators
The assignment operator is the humble = sign.
The assignment operator works like this: it takes whatever value is on the right side of the operator, and it puts it into the variable on the left side of the operator.
For example:
<?php

$age = 123;

?>
In the above example, we’re taking a data of type integer and value of 123, and using the assignment operator =, we’re storing the value into the $age variable.
In another article on our site, we’ve published a graphical explanation of what is a variable in php.
We’ll continue with some basic mathematical operators, and we’ll see how the assignment operator can be combined with mathematical operators for some interesting use cases.
Mathematical operators
Mathematical operators work the same as in maths:
<?php

	echo 1 + 2;
	echo "<br>";
	echo 3 * 4;
	echo "<br>";
	echo 4 - 3;
	echo "<br>";
	echo 2 / 1;
?>
Let’s save this file as mathoperators.php and open it with:
chromium localhost/first-php-app/mathoperators.php
This is the output:
3
12
1
2
Now let’s see how we can combine assignment operators and mathematical operators.
Combining assignment operators and mathematical operators
We often combine these operators to achieve what’s known as “the shorthand syntax”. For example, if we want to store the result of addition of two integers in a variable, we can write this:
<?php

$a = 10;
$b = 20;

$a = $a + $b;

?>
Note the $a = $a + $b; line above. We can write it more succintly like this:
<?php

$a += $b;

?>
In the above example, we’ve combined the mathematical operator + and the assignment operator = to shorten the syntax. This is useful because it’s faster to type, but it can also be confusing.
Let’s save another file; we’ll call it math-assignment-combo.php:
<?php

$a = 10;
$b = 20;

$a += $b; // 30
$b -= $a; // 10
$a *= $b; // 300
$a /= $b; // 30

?>
Next are the comparison operators.
Comparison operators
Let’s add a new file; we’ll name it comparison-operators.php.
touch comparison-operators.php
subl comparison-operators.php
With comparison operators, we ask questions about the relationship between two values, for example:
- is value A larger then value B
- is value A of the same type as value B
- etc.
We’ll cover each comparison operator in php, next.
Equality operator
We’ll start with the file by adding a simple equality comparison.
Equality comparison operator is two equals signs next to each other, without spaces, like this: ==.
We add the values to compare to the left and the right side of the equality comparison operator:
<?php

var_dump(123 == 123);

?>
In the code above, we’re asking: “Is the value on the left equal to the value on the right?”
Now we’ll run the file from the command line with:
chromium localhost/first-php-app/comparison-operators.php
We’ll get back the words “bool(true)” printed on the screen, which is php’s way of telling us that the value of 123 is indeed equal to the value of 123.
Now let’s change our code so that it gives us the answer that the values are not equal, i.e bool(false):
<?php

// var_dump(123 == 123);
var_dump(124 == 123);

?>
Obviously, 124 is not equal to 123, and when we refresh the webpage, we’ll indeed get bool(false) printed on the screen. Let’s make it bool(true) again, by adding a 1 to 123:
<?php

// var_dump(123 == 123);
// var_dump(123 == 123);
var_dump(124 == 123 + 1);

?>
Now we’ll get bool(true) printed on the screen again.
Operator precedence
But, how is this possible? How does the computer know to first run 123 + 1 and then compare the result? In other words, why does the code work as if we wrote this:
(124) == (123 + 1);
… and not like this:
(123 == 123) + 1;
This has to do with order of operations; in PHP, it’s called operator precedence. Just like in mathematics, some operators take precedence over other operators. Thus, the + operator takes precedence over the == operator. This is what makes it possible for our code to run as expected when we write:
124 == 123 + 1;
Next, let’s see how we can check both for equality and for type.
Identical operator in php
The identical operator is === (three equal signs together). It checks both for the eqality of value and of type.
Let’s update the previous example and run the equality operator:
<?php

// var_dump(123 == 123);
// var_dump(123 == 123);
// var_dump(124 == 123 + 1);
var_dump(123 === 123);

?>
We’ll get back bool(true).
How do we get a false now? Simply by changing the type on one of these two numbers.
<?php

// var_dump(123 == 123);
// var_dump(123 == 123);
// var_dump(124 == 123 + 1);
// var_dump(123 === 123);
var_dump(123 === "123");

?>
Since the identical operator checks for both the value and the type, and since we’re comparing the string type and the integer type in the above example, the output of running it will be bool(false).
Next, we’ll see how to check if two values are not equal in php.
Checking for inequality
We have two ways of checking if two values are not equal:
- With the
!=operator - With the
<>operator
Let’s test how both of these work:
<?php

// var_dump(123 == 123);
// var_dump(123 == 123);
// var_dump(124 == 123 + 1);
// var_dump(123 === 123);
// var_dump(123 === "123");
var_dump(123 <> 123); // bool(false)
echo "<br>";
var_dump(123 != 123);

?>
Running the above code will result in the following text printed out on our webpage:
bool(false)
bool(false)
Checking if values are not identical
This operator is the opposite of the === (“triple-equals operator”).
Here’s the code:
<?php

// var_dump(123 == 123);
// var_dump(123 == 123);
// var_dump(124 == 123 + 1);
// var_dump(123 === 123);
// var_dump(123 === "123");
// var_dump(123 <> 123); // bool(false)
// echo "<br>";
// var_dump(123 != 123);
var_dump(123 !== "123"); // bool(true)
var_dump(123 !== 123); // bool(false)
?>
It is true that 123 is not identical to "123", and it is false that 123 is not identical to 123.
Greater than and less than comparisons
There are actually four operators in this group:
- greater than operator,
> - less than operator,
< - greater than or equal to operator,
>= - less than or equal to operator,
<=
Here’s the updated comparison-operators.php:
<?php

// var_dump(123 == 123);
// var_dump(123 == 123);
// var_dump(124 == 123 + 1);
// var_dump(123 === 123);
// var_dump(123 === "123");
// var_dump(123 <> 123); // bool(false)
// echo "<br>";
// var_dump(123 != 123);
// var_dump(123 !== "123"); // bool(true)
// var_dump(123 !== 123); // bool(false)
var_dump(123 > 123); // bool(false)
var_dump(123 < 123); // bool(false)
var_dump(123 >= 123); // bool(true)
var_dump(123 <= 123); // bool(true)
?>
Next are the incrementing operators.
Incrementing operators
The incrementing operators are:
- prefix incrementing operator, added before the variable
- postfix incrementing operator, added after the variable
To get started with incrementing operators, we’ll first add a new file:
cd /var/www/html/first-php-app/
touch incrementing-operators.php
subl incrementing-operators.php
Now we’ll add the following code to our new file:
<?php

$num = 123;
echo $num++; // prints: 123
echo "<br>";
echo ++$num; // prints: 125

?>
When we visit localhost/first-php-app/incrementing-operators.php in our browser, we’ll see two numbers:
123
125
Why is this happening?
It is happening because the behavior of the ++ operator is different based on where it’s placed; if it’s placed in the postfix position, it will increment the variable value by one only after the echo command has already finished; if it’s placed in the prefix position, it will first increment the variable, then echo the value of the variable.
If this is confusing, it can help to re-write the line that reads echo $num++; like this:
echo $num; // value 123 is printed on the screen
$num = $num + 1; // the value of $num is now 124
Next, we can re-write echo ++$num like this:
$num = $num + 1; the value of $num is now 125
echo $num; // value 125 is printed on the screen
Next is the string operator.
String operator
The string operator is the humble dot, i.e the .. It’s used to put two strings together, like this:
<?php
$greeting = "Hello";
$place = "World";

echo $greeting . " " . $place;
?>
We can save the above code in a new file; let’s call it string-operator.php.
If we save and open this new file in the browser, we’ll get this output:
Hello World
It’s also possible to use the string concatenation operator to keep updating a variable with additional values. Let’s see an example by adding more code to our string-operator.php file:
// code skipped for brevity...

$dummy_text = "Lorem ";
$dummy_text .= "ipsum ";
$dummy_text .= "dolor ";
$dummy_text .= "sit ";
$dummy_text .= "amet.";

echo $dummy_text;

?>
After opening the above file in the browser, we’ll see the full dummy sentence printed to the screen: Lorem ipsum dolor sit amet.
This makes the string concatenation operator really handy for a number of different use cases.
Next are the logical operators.
Logical operators
Before looking at logical operators, we need to understand why their useful. So let’s start with a practical example of a developer and a client discussing a freelancing gig.
So, we’re interviewing for a new web developer freelancing gig, and we’re discussing the pay. We’d be happy with any pay that is above $20 an hour, but we’ve started with a bid of $30 an hour. Let’s put that in code:
<?php

$pay = 30;

echo ($pay > 20); // our codition for accepting the gig

?>
However, our client also has a budget, and they can afford to pay up to $25 an hour, so:
<?php

$pay = 30;

echo ($pay < 25); // our client's condition for accepting the gig

?>
We can now add an if condition and save it as logical-operators.php:
<?php

$pay = 30;

if ($pay > 20) {
	echo "I, the freelancer, accept the gig at this price :)";
}
?>
If we ran the above code in the browser, we’d get this output:
I, the freelancer, accept the gig at this price.
Great, we’re printing out the sentence if the gig pays good enough for us, the freelancer. Let’s now look at it from the side of the client. Let’s re-write the code:
<?php

$pay = 30;

if ($pay < 25) {
	echo "I, the client, accept to pay for the gig at this price :)";
} else {
	echo "I, the client, cannot afford to pay so much for this gig.";
}

?>
Now we’ll get the following printed on the screen:
I, the client, cannot afford to pay so much for this gig.
How do we now combine the “two sides of the story”? This is where logical operators come in. With logical operators, we combine conditions. In other words, we use logical operators to test if our variables satisfy multiple conditions.
Using the above example of a freelancing gig negotiation, we can re-write it using the AND logical operator: &&. The AND logical operator will receive two tests: one on the left of the && operator, and one on the right. In pseudo-code, we can write it like this:
first_condition && second_condition
Since our own condition is for the gig to pay at least $20 an hour, and our client’s condition is to pay at most $25 an hour, we can combine these conditions using the && logical operators like this:
<?php

$pay = 30;
$our_condition = $pay > 20;
$their_condition = $pay < 25;

if ($our_condition && $their_condition) {
	echo "Both the client and the freelancer are happy with the price";
} else {
	echo "Either the client, or the freelancer, or both, are not happy with the price.";
};

?>
The above code will echo out the sentence from the else block.
Now let’s make it a bit more fun by randomizing the value stored in the $pay variable. For that, we’ll use the php’s built-in rand method.
Now we can re-write our conditional-operators.php file:
<?php

$pay = rand(10, 40);
$our_condition = $pay > 15;
$their_condition = $pay < 25;

if ($our_condition && $their_condition) {
	echo "Both the client and the freelancer are happy with the price";
} else {
	echo "Either the client, or the freelancer, or both, are not happy with the price.";
};

?>
The && is not the only logical operator. Actually, there are the total of six conditional operators in php:
andcompares$aand$b; returns true if both$aand$bare trueorcompares$aand$b; returns true if either one of them is truexorcompares$aand$b; returns true if either one is true (but not both!)&&compares$aand$b; returns true if both$aand$bare true||(“or”), compares$aand$b; returns true if either$aor$bare true!(“not”), returns true if$ais false (i.e. it answers the question: Is$anot true?)
Now we’ll add another file where we’ll run each of these comparisons; we’ll name the file comparison-operators-2.php:
<?php

$a = true;
$b = true;
$c = false;
$d = false;

var_dump($a and $b); // (1)  true  AND true  === true
var_dump($a or $b);  // (2)  true  OR  true  === true
var_dump($a or $c);  // (3)  true  OR  false === true
var_dump($c or $d);  // (4)  false OR  false === false
var_dump($c and $d); // (5)  false AND false === false
var_dump($a xor $b); // (6)  true  XOR true  === false
var_dump($a xor $c); // (7)  true  XOR false === true
var_dump($a && $b);  // (8)  true  AND true  === true
var_dump($a && $c);  // (9)  true  AND false === false
var_dump($a || $b);  // (10) true  OR  true  === true
var_dump($a || $c);  // (11) true  OR  false === true
var_dump(!$a);       // (12) !true === false
var_dump(!$c);       // (13) !false === true
var_dump(!a || $c);  // (14) !true OR !false === true

?>
Note that the && operator’s precedence is higher than the and operator’s precedence, and the || operator’s precedence is higher than the or operator’s precedence.
Comparison operators can sometimes get confusing. It’s important to understand that they’re just a helpful tool, and try to simplify things wherever possible.
Next is the null coalesce operator.
Null coalesce operator
To understand the null coalesce operator, we need to start with an if-else statement.
Here’s a simple if-else statement example:
<?php

$age = 21;

if($age > 20) {
	$message = "You can enter the bar";
	echo $message;
} else {
	$message = "You cannot enter the bar";
	echo $message;
}

?>
Let’s save the above code in a file called null-coalesce-operator.php.
We can further simplify the above if-else statement using the ternary operator:
<?php

$age = 21;
$message = $age > 20 ? "You can enter the bar" : "You cannot enter the bar";

echo $message;

?>
We can make the messages in the above code easier to change by storing them in variables:
<?php

$age = 21;
$allowed = "You can enter the bar";
$forbidden = "You cannot enter the bar";

$message = $age > 20 ? $allowed : $forbidden;

echo $message;
Now that we’ve got the ternary operator set up, we can see how the null coalesce operator, the ?? operator, is used:
<?php

$age = 21;
$allowed = "You can enter the bar";

$message = $age > 20 ?? $forbidden;

echo $message;

?>
What we did in the above code is: we’ve effectively cut out the section that reads ? $allowed :, and we’ve replaced it with the null coalesce operator, the ??. How this works now is:
- if
$age > 20istrue, return1 - otherwise, return the value stored in the
$forbiddenvariable
Here is the full code for the null-coalesce-operator.php file, with all the exercises:
<?php

$age = 21;

if($age > 20) {
	$message = "You can enter the bar";
	echo $message;
} else {
	$message = "You cannot enter the bar";
	echo $message;
}


echo "<br>";
/* ---------------------------------- */


$age = 21;
$message = $age > 20 ? "You can enter the bar" : "You cannot enter the bar";

echo $message;

echo "<br>";
/* ---------------------------------- */


$age = 21;
$message = $age > 20 ? "You can enter the bar" : "You cannot enter the bar";

echo $message;

echo "<br>";
/* ---------------------------------- */


$age_defined = 21;
$allowed = "You can enter the bar";

if($age_defined > 21) {
	$message = $age_defined ?? $forbidden;
}

echo $message;

echo "<br>";
/* ---------------------------------- */


$allowed = "You can enter the bar";

$message = $age_undefined ?? $forbidden;

echo $message;

echo "<br>";
/* ---------------------------------- */


?>
Next are the decrementing operators.
Decrementing operators
While the incrementing prefix and postfix operators, ++, increase a value by 1, the decrementing operators, written as two minus signs together, --, decrease the value by 1:
<?php

$countdown = 30;
$countdown = --$countdown;
$countdown = $countdown--;

?>
Next is the spaceship operator.
Spaceship operator
While other comparison operators return a boolean (true or false), the spaceship operator returns -1, 0, or 1.
It looks pretty weird: <=>. I still don’t see a spaceship there, but at least it’s a memorable name.
Here’s a quick example:
<?php

echo 123 <=> 456;

?>
The spaceship operator does three comparisons in one fell swoop:
- it checks if 123 is less than 456
- it checks if 123 is equal to 456
- it checks is 123 is greater than 456
To run the above example, we’ll save it as spaceship-operator.php, then open it in a browser. We’ll get back the value of -1, which means that 123 is less than 456.
This concludes our discussion of operators in PHP.
In part 3 of our PHP article series, we’ll discuss functions, arrays, objects, and classes.

