Working with ngx-bootstrap's typeahead component in Angular 8
This is the eighth post in the series covering ngx-bootstrap components in Angular 8
By: Ajdin Imsirovic 02 September 2019
In this eighth post in our series of articles on building Angular 8 layouts with ngx-bootstrap, we’re covering the typeahead ngx-bootstrap component in Angular 8.
If you are a complete beginner, you might wanna read the series from the very first article.
Here is the list of posts for the entire series:
- How to prototype Bootstrap 4 layouts with Angular 8, part 1
- How to prototype Bootstrap 4 layouts with Angular 8, part 2
- Working with ngx-bootstrap tabs in Angular 8
- Working with ngx-bootstrap alerts in Angular 8
- Working with ngx-bootstrap buttons, carousel, datepicker, and dropdowns in Angular 8
- Working with ngx-bootstrap modals, pagination, popover, and progress bars in Angular 8
- Working with ngx-bootstrap’s rating, soratble, timepicker, and tooltip components in Angular 8
- Working with ngx-bootstrap’s typeahead component (You are here!)
To see what we’ll build, have a look at the completed app in Stackblitz.
Following the recipe
If you’ve read a few of the previous articles in this series, you’ll notice that we’ve been using a tried and tested learning tool, in the form of a recipe: a series of steps that we need to take in order to stay on course of working with our components in ngx-bootstrap and Angular 8.
The steps are outlined in several places in this article series, such as this link here, which gives us a nice overview of steps that we need to take.
If we further simplify the recipe, we can boil it down to 3 steps:
- Add the component folders and files (the files’ contents comes from the respective ngx-bootstrap component’s official docs)
- Import the usage module, and list it in
imports; import the class component, and list it indeclarations - Use the newly added component’s template as a custom HTML tag inside the parent component (in our case,
app.component.html)
To keep our recipe short and simple, we’re assuming that ngx-bootstrap dependency and Bootstrap 4 styles have already been added. For a detailed instruction on how to do these two things, refer to this section of the second post in this series.
So, we’re beginning to customize the default Angular 8 Stackblitz app with this commit.
Next, we’ll follow the three steps outlined above to add the typeahead ngx-bootstrap component to our project.
1. Adding the component’s folder and files
We begin by adding the typeahead folder, and inside it, our component’s class file (typeahead.component.ts) and template file (typeahead.component.html).
Following the ngx-bootstrap typeahead’s reactive example, here’s the contents of the class file:
1
2
3
4
5
6
7
8
9
10
<pre class="card card-block card-header">Model: {{ myForm.value.state | json }}</pre>

<form [formGroup]="myForm">
  <input formControlName="state"
         [typeahead]="states"
         [typeaheadOptionsLimit]="7"
         [typeaheadMinLength]="0"
         placeholder="Typeahead inside a form"
         class="form-control">
</form>
Along the same lines, here’s the content’s of the template file:
1
2
3
4
5
6
7
8
9
10
11
12
13
14
15
16
17
18
19
20
21
22
23
24
25
26
27
28
29
30
31
32
33
34
35
36
37
38
39
40
41
42
43
44
45
46
47
48
49
50
51
52
53
54
55
56
57
58
59
60
61
62
63
64
65
66
67
import { Component } from '@angular/core';
import { FormControl, FormGroup } from '@angular/forms';

@Component({
  selector: 'demo-typeahead-reactive-form',
  templateUrl: './typeahead.component.html'
})
export class DemoTypeaheadReactiveFormComponent {
  stateCtrl = new FormControl();

  myForm = new FormGroup({
    state: this.stateCtrl
  });

  states = [
    'Alabama',
    'Alaska',
    'Arizona',
    'Arkansas',
    'California',
    'Colorado',
    'Connecticut',
    'Delaware',
    'Florida',
    'Georgia',
    'Hawaii',
    'Idaho',
    'Illinois',
    'Indiana',
    'Iowa',
    'Kansas',
    'Kentucky',
    'Louisiana',
    'Maine',
    'Maryland',
    'Massachusetts',
    'Michigan',
    'Minnesota',
    'Mississippi',
    'Missouri',
    'Montana',
    'Nebraska',
    'Nevada',
    'New Hampshire',
    'New Jersey',
    'New Mexico',
    'New York',
    'North Dakota',
    'North Carolina',
    'Ohio',
    'Oklahoma',
    'Oregon',
    'Pennsylvania',
    'Rhode Island',
    'South Carolina',
    'South Dakota',
    'Tennessee',
    'Texas',
    'Utah',
    'Vermont',
    'Virginia',
    'Washington',
    'West Virginia',
    'Wisconsin',
    'Wyoming'
  ];
}
The app as it currently is, can be found in this commit.
2. Import the usage module, and the class component
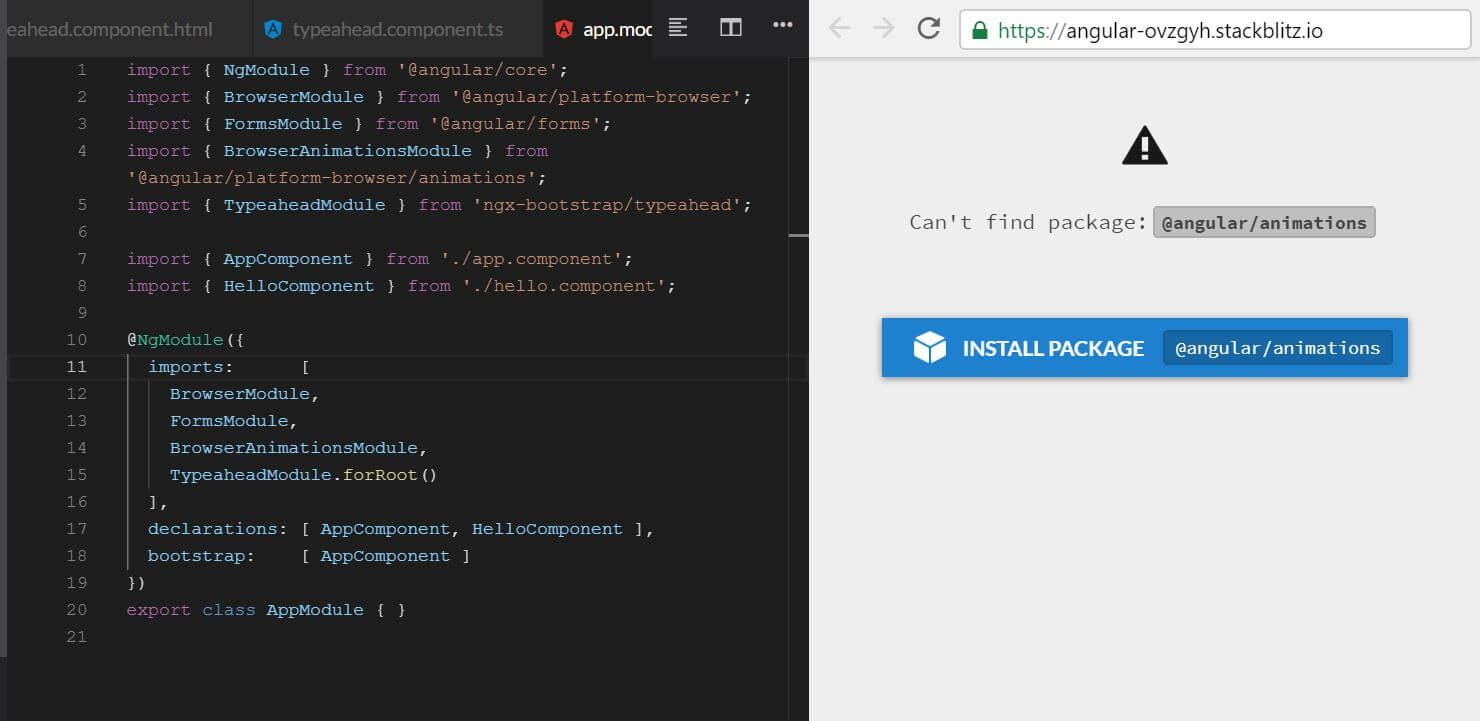
As it says in the docs, we’ll import the BrowserAnimationsModule and the TypeaheadModule, and we’ll install the @angular/animations package, as the Stackblitz app prompts us to do:
We’ll also import the component class into app.module.ts:
// ...code skipped for brevity...
import { DemoTypeaheadReactiveFormComponent } from './typeahead/typeahead.component.ts';
// ...code skipped for brevity...
  declarations: [
    AppComponent,
    HelloComponent,
    DemoTypeaheadReactiveFormComponent
  ],
Once we save the changes, we’ll get this error:
Template parse errors:
Can't bind to 'formGroup' since it isn't a known property of 'form'. ("<pre class="card card-block card-header">Model: {{ myForm.value.state | json}}</pre>
We’ve seen the exact same error in the previous post in this series, and the solution is explained in detail there. What it boils down to is that in order to use formGroup, we have to import the ReactiveForms module into app.module.ts, like so:
// ...code skipped for brevity...
import { ReactiveFormsModule } from '@angular/forms';
// ...code skipped for brevity...
  imports:      [
    BrowserModule,
    FormsModule,
    ReactiveFormsModule,
    BrowserAnimationsModule,
    TypeaheadModule.forRoot()
  ],
After saving the changes, we can see our update’s commit here.
3. Use the new component’s template as a custom HTML tag
Inside app.component.html, it’s time to use our custom HTML tag, by adding it to the very top of this file, like so:
<demo-typeahead-reactive-form></demo-typeahead-reactive-form>
That’s it, we’ve successfully added the typeahead component!

Here’s the Github code for our completed typeahead example.
This concludes our series on using ngx-bootstrap with Angular 8 on Stackblitz.

