Prepping a brand new Vue app for BootstrapVue practice
To get familiar with the BootstrapVue library, it's good to have a streamlined set up that we can use again and again
By: Ajdin Imsirovic 03 October 2020
If you are brand new to Vue, it would be useful to go through our Build your first Vue 2 app today tutorial first. The linked tutorial is a detailed instruction on setting up Node.js, npm, and installing the Vue CLI itself.
Additionally, it might be useful to first read the tutorial on adding an existing local project to github, since we’ll be relying on git and GitHub to track our progress.
In this tutorial, we assume that’s already taken care of.
We’ll build a brand new Vue app using Vue CLI.
This app will be a starter app that we can use for all the other practice work related to understanding the BootstrapVue library.
What this means is: we’ll have a starter point that we can easily build on as we learned the various BootstrapVue components and how they are used.
The workflow is pretty simple:
- We’ll install a brand new Vue app using the Vue CLI
- We’ll import the BootstrapVue library
- We’ll remove all the redundant code from the starter app (mainly from the
HelloWorld.vuefile)
After we’ve done that, we’ll be ready to add any kind of BootstrapVue component to the HelloWorld.vue file, and thus be able to examine that specific component in isolation.
The whole point of doing that is: we are removing complexity by focusing on a single, simple component, in a separate app.
This might seem like an overkill, but the beauty of this approach is: once we know how to setup a brand new app and have it ready for whatever component we might want to add, we can use Git to reset our app for each different component we want to examine. Alternatively, we can open new branches for each separate component. We’ll describe both approaches in this tutorial, and it’s up to you to pick a workflow that works for you.
1. Build a new Vue app with Vue CLI
This is a simple, two-step process:
cd ~/Desktop && vue create -d bv-components;
cd bv-components && npm run serve -- --port 4567;
We can now browse our starter Vue app at localhost:4567.
2. Remove redundant code
In this section, we’ll get rid of all the code that we don’t need. Rather than showing what we’ll remove, step by step, let’s simply inspect the affected files, after the change. That means that you can simply copy-paste the entire contents of each of these files, if you’re following each step on your machine.
We’ll begin with the HelloWorld.vue file, inside the src/components folder.
1
2
3
4
5
6
7
8
9
10
11
12
13
14
<template>
  <div class="hello">
    <h1>{{ msg }}</h1>
  </div>
</template>

<script>
export default {
  name: 'HelloWorld',
  props: {
    msg: String
  }
}
</script>
We’ve removed most of the HTML from the template tag, and we’ve completely deleted the styles, together with the style tag.
Next, we’ll update the src/App.vue file, like this:
1
2
3
4
5
6
7
8
9
10
11
12
13
14
15
16
<template>
  <div id="app">
    <HelloWorld msg="A BootstrapVue component example"/>
  </div>
</template>

<script>
import HelloWorld from './components/HelloWorld.vue'

export default {
  name: 'App',
  components: {
    HelloWorld
  }
}
</script>
In the above file, we’ve deleted the starter image (Vue logo), we’ve changed the value in the msg attribute to “A BootstrapVue component example”, and we’ve completely removed the component’s styles.
This should leave us with only an unstyled h1 heading on our app’s browser tab:
A BootstrapVue component example
As a side note, the msg attribute is a nice example of how Vue passes data from a parent to a child component, using props; msg is a prop, and we pass to our HelloWorld.vue component values we want by simply specifying them as specific values of the msg prop.
If we ran a git diff at this point:
git diff
… we’d get the following output for the App.vue file:
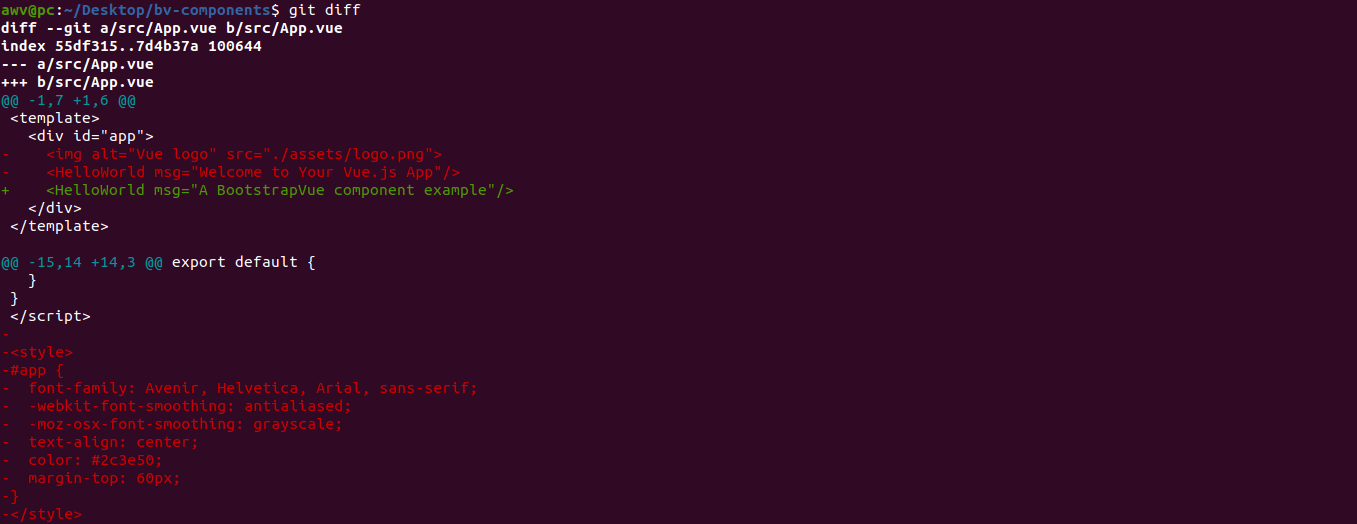
We’d also get similar output for the HelloWorld.vue component.
At this point, we’ll save our current changes as a new commit, but before we do, let’s make sure that the linter doesn’t complain.

We can now save these changes as a new commit, using the following commands:
git add --all;
git commit -m "Remove redundant code";
git push;
This newly-pushed commit is on Github.
3. Add BootstrapVue to the app
We’ll add BootstrapVue with npm:
npm install bootstrap-vue bootstrap
Let’s commit this update too, to see the changes in more fine-grained detail.
git add --all;
git commit -m "Add BootstrapVue and Bootstrap";
git push;
Now that we have the add Bootstrap and BootstrapVue commit, we’ll add the BootstrapVue library to our project.
In src/main.js, we’ll add the newly-added node module, on line 3:
import BootstrapVue from "bootstrap-vue";Additionally, we’ll import the styles here, so that they’re globally available:
import "bootstrap/dist/css/bootstrap.css"
import "bootstrap-vue/dist/bootstrap-vue.css"
Here’s the entire src/main.js file after these updates:
1
2
3
4
5
6
7
8
9
10
11
12
import Vue from 'vue'
import App from './App.vue'
import BootstrapVue from "bootstrap-vue"

import "bootstrap/dist/css/bootstrap.css"
import "bootstrap-vue/dist/bootstrap-vue.css"

Vue.config.productionTip = false

new Vue({
  render: h => h(App),
}).$mount('#app')
However, we’re still not done. Currently, if we looked at our browser, we’d see this error:
Failed to compile.

./src/main.js
Module Error (from ./node_modules/eslint-loader/index.js):

/home/awv/Desktop/b-v-modal/src/main.js
  3:8  error  'BootstrapVue' is defined but never used  no-unused-vars

✖ 1 problem (1 error, 0 warnings)
This means we have to “use” our BootstrapVue library. In practice, that means that we need to add one more line to main.js:
Vue.use(BootstrapVue)Now our entire src/main.js file looks as follows:
1
2
3
4
5
6
7
8
9
10
11
12
13
14
import Vue from 'vue'
import App from './App.vue'
import BootstrapVue from "bootstrap-vue"

import "bootstrap/dist/css/bootstrap.css"
import "bootstrap-vue/dist/bootstrap-vue.css"

Vue.config.productionTip = false

Vue.use(BootstrapVue)

new Vue({
  render: h => h(App),
}).$mount('#app')
After we’ve saved all the updates, we’ll notice that our msg prop’s value is still the only thing displayed on the screen, but this time the font is updated to Bootstrap’s default, sans-serif font. That means we’ve successfully started using the BootstrapVue library.
4. Testing out different BootstrapVue components
At this point, we’re ready to test-drive different BootstrapVue components.
A nice way to do this is to commit all our changes so far (since git comes pre-setup with each new Vue CLI app).
As soon as our local BootstrapVue app was built by Vue CLI, it added git with an initial commit, which can be inspected by running:
git log --oneline
The expected output should look like this:
abcdef0 (HEAD -> master) init
Whenever we make new updates, we can commit them with the following code:
git add --all
git commit -m "Added the BootstrapVue modal"
Obviously, the message “Added the BootstrapVue modal” is just an example message here, and we will adjust it according to the work we’ve performed.
Now that all our changes are tracked by git, we have two options:
- Use
git checkout . - Open a new branch for each new component
Using the git checkout . command
We can simply add whatever components we want from BootstrapVue, see how they work, then, instead of committing the changes, we can just run:
git checkout .
This will simply “delete” all our changes, i.e. revert the state to the most recent git commit.
Opening a new branch for each new component
Alternatively, we can open a new branch for each new BootstrapVue component we want to work with.
We start from the most recent commit message, then for each new component we want to examine, run:
git checkout -b <branch-name>
The <branch-name> is going to be the name of the component, so for example, we could run a commands like this:
git checkout -b modal
Then we’d add the modal code, and once we’re done, we’d switch back to the master branch, with:
git checkout master
After that, we’d checkout a new branch for a new component, for example:
git checkout -b alert
This way, we can have a separate branch for each new component. This approach might look like more work, but at least we can have neatly organized setup that allows for a clear-cut examination of different parts of the BootstrapVue library, and possibility to branch out our “discoveries” on different components into a separate branch - which might be very useful as we explore the library.
We’ll opt in for using the branching approach; feel free to check out the repository.
Let’s try it out right now.
Opening a new branch for the alert component
We’re currently on the only branch in the repository, which is the master branch. We can verify that by doing this:
git branch;
The above command returns a list of branches; in our case, the list has only one item:
* master
To check out a new branch, we’ll run the git checkout -b alert branch, as already explained.
Now we can run git branch again, and this time, the output is:
* alert
master
Obviously, the asterisk is front of the branch name signifies the currently active (“the currently checked-out”) branch.
Now we can add updates that only have to do with the alert branch, as follows.
We’ll go back to HelloWorld.vue, and paste in the alert component code copied from BootstrapVue’s website, into the template section. The updated template section of HelloWorld.vue should now look like this:
1
2
3
4
5
6
7
8
9
10
11
12
<template>
  <div class="hello">
    <h1>{{ msg }}</h1>
    <b-alert show>Default Alert</b-alert>

    <b-alert variant="success" show>Success Alert</b-alert>

    <b-alert v-model="showDismissibleAlert" variant="danger" dismissible>
      Dismissible Alert!
    </b-alert>
  </div>
</template>

