Looping over data in React
A demo of how to loop over data in React, when that data comes from a separate JavaScript file
By: Ajdin Imsirovic 25 January 2022
In this chapter, we’ll see a quick example of how to loop over some data in a separate JavaScript file.
Let’s continue working with our reactbootstrap1 app from previous chapters.
Table of contents
- Adding the data file
- Displaying the array data
- Passing props to display the data dynamically
- Adding another prop
- Props destructuring
Adding the data file
We’ll add a new file; let’s name it products.js, and add the following code to it:
1
2
3
4
5
6
7
8
9
10
11
12
13
14
15
16
17
18
19
20
21
const products = [
    {
      name: 'T-Shirt',
      description: 'Funny slogan shirt',
      size: 'XL'
    },
    {
      name: 'Hoodie',
      description: 'Navy Blue Hoodie',
      size: 'X',
      discount: '10%'
    },
    {
      name: 'Slippers',
      description: 'Leather-bound slippers',
      size: 10,
      color: 'tan'
    }
  ];

export default products;
Now that we’ve added this array of objects, let’s see how we can add them to our app.
Displaying the array data
Let’s add a new component, and give the file the name of Product.js:
1
2
3
4
5
6
7
8
9
10
11
12
13
14
15
const Product = () => {
    return (
        <div className="card">
            <div className="card-body">
                <h5 className="card-title">Card title</h5>
                <p className="card-text">
                    Product info here.
                </p>
                <a href="#" className="btn btn-primary">Go somewhere</a>
            </div>
        </div>
    );
}

export default Product;
In the above code, we’ve slightly altered the example Bootstrap card code from Bootstrap 5.1 card component’s official docs.
Now we need to import this component into App.js. Here’s the fully updated file:
1
2
3
4
5
6
7
8
9
10
11
12
13
14
15
16
17
18
import MainMenu from './MainMenu';
import Jumbotron from './Jumbotron';
import Footer from './Footer';
import Product from './Product';
import './App.css';

const App = () => {
  return (
    <div className="App">
      <MainMenu />
      <Jumbotron />
      <Product />
      <Footer />
    </div>
  );
}

export default App;
Next, let’s import the products data too.
import productData from 'products';
This will be at the very top of our App.js file.
Now we’ll need to loop over this data, and for each product we have, we’ll add another <Product /> component.
Here’s the updated App.js code:
1
2
3
4
5
6
7
8
9
10
11
12
13
14
15
16
17
18
19
20
21
22
23
24
import productData from './products';

import MainMenu from './MainMenu';
import Jumbotron from './Jumbotron';
import Footer from './Footer';
import Product from './Product';
import './App.css';

const App = () => {
  return (
    <div className="App">
      <MainMenu />
      <Jumbotron />
      {productData.map(prod =>
        (
          <Product key={prod.name} />
        )
      )}
      <Footer />
    </div>
  );
}

export default App;
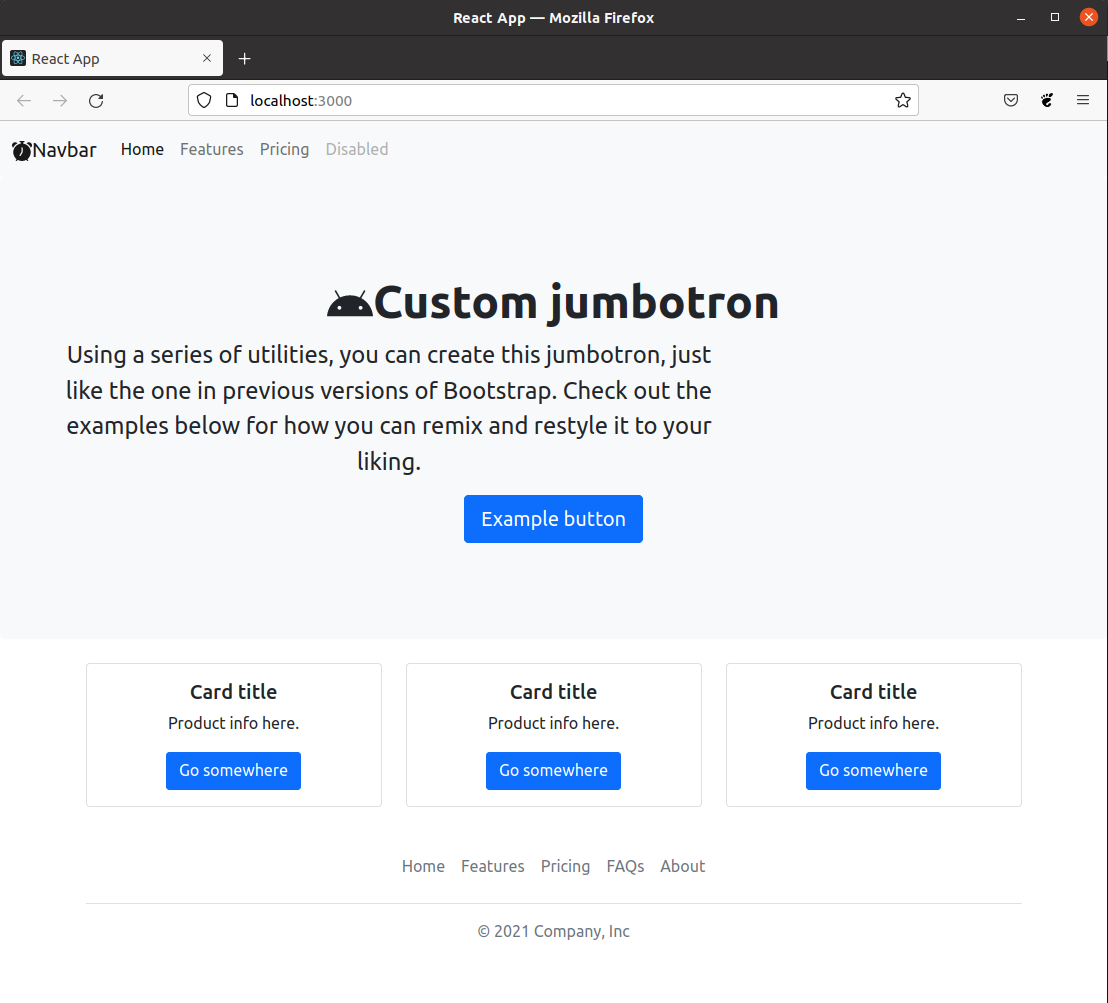
This was as simple of a start as we could do to see some kind of a result.
Before checking the update in the browser, make sure that the Product.js file is inside the ./src folder, just like all the other components.
If not, you’ll get an error message such as this one:
Failed to compile

./src/App.js
Module not found: Can't resolve 'products' in '/home/pc/Desktop/ReactFromScratch/reactbootstrap1/src'

This error occurred during the build time and cannot be dismissed.
However, we haven’t made the above mistake, and thus, here’s the result of our updates in the browser.
Let’s update our App.js just a bit more so that we get a better result:
1
2
3
4
5
6
7
8
9
10
11
12
13
14
15
16
17
18
19
20
21
22
23
24
25
26
27
28
29
30
import productData from './products';

import MainMenu from './MainMenu';
import Jumbotron from './Jumbotron';
import Footer from './Footer';
import Product from './Product';
import './App.css';

const App = () => {
  return (
    <div className="App">
      <MainMenu />
      <Jumbotron />
      <div className="container">
        <div className="row">
          {productData.map(prod =>
            (
              <div className="col">
                <Product key={prod.name} />
              </div>
            )
          )}
        </div>
      </div>
      <Footer />
    </div>
  );
}

export default App;
Now our product cards will line up next to each other, rather then on top of each other.
Next, we need to pass some props to our cards, so that they are displaying the data dynamically.
Passing props to display the data dynamically
Now we’ll need to display some of the data in our product cards, as follows.
In App.js, we’ll need to update our mapping over productData like this:
1
2
3
4
5
6
7
8
9
10
{productData.map(prod =>
    (
        <div className="col">
        <Product
            key={prod.name}
            name={prod.name}
        />
        </div>
    )
)};
Now we’ll update our Product.js file as well, like this:
1
2
3
4
5
6
7
8
9
10
11
12
13
14
15
16
const Product = (props) => {
    const { name } = props;
    return (
        <div className="card">
            <div className="card-body">
                <h5 className="card-title">{name}</h5>
                <p className="card-text">
                    Product info here.
                </p>
                <a href="#" className="btn btn-primary">Go somewhere</a>
            </div>
        </div>
    );
}

export default Product;
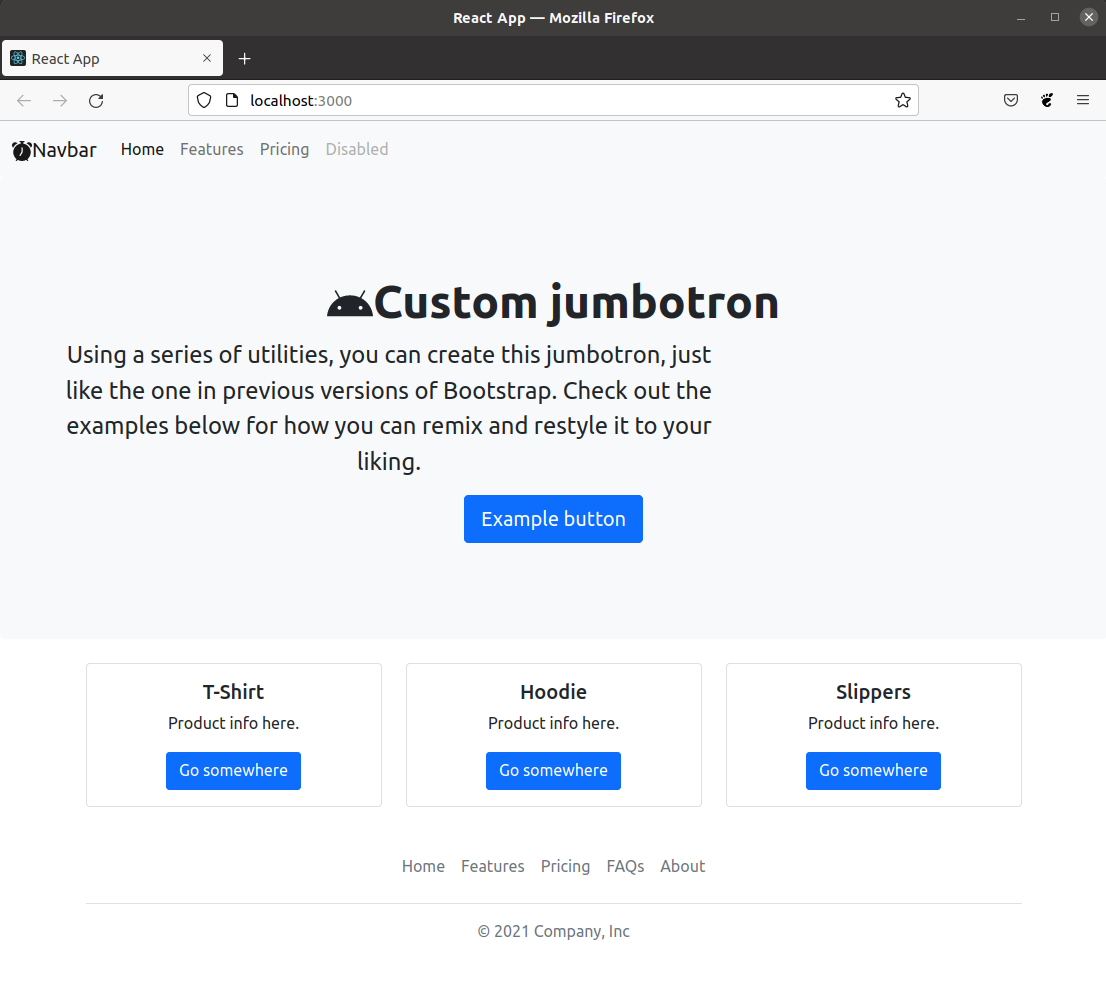
After these couple of simple updates, now each of the product cards should show the product name.
Here’s the updated screenshot of our app at this point.
Next, let’s add another prop.
Adding another prop
We’ll add the description prop to our cards, in another two-step move.
First, we’ll update App.js like this:
1
2
3
4
5
6
7
<div className="col">
    <Product
        key={prod.name}
        name={prod.name}
        description={prod.description}
    />
</div>
Next, we’ll update Product.js like this:
1
2
3
4
5
6
7
8
9
10
11
12
13
14
15
16
const Product = (props) => {
    const { name, description } = props;
    return (
        <div className="card">
            <div className="card-body">
                <h5 className="card-title">{name}</h5>
                <p className="card-text">
                    {description}
                </p>
                <a href="#" className="btn btn-primary">Go somewhere</a>
            </div>
        </div>
    );
}

export default Product;
After this update, our products are even more custom.

This is a simple way to use props more dynamically in our apps.
There’s another way to do this, and this way is known as props desctructuring.
Props destructuring
There are a few ways to do props destructuring in functional components.
Here’s one:
1
2
3
4
5
const Product = (props) => {
    const { name, description } = props;
    return (
        ...
    )
Alternatively, we can destructure right inside the passed-in props parameter, in which case we get this:
1
2
3
4
5
const Product = ({ name, description }) => {
    return (
        ...
    )
}
That’s it for this chapter. In the next one we’ll discuss some beginner-level tips and tricks.

