Build a todo app in React, using hooks and functional components
Let's build a todo app in React, step by steps, with no steps ommitted
By: Ajdin Imsirovic 25 January 2022
We’ve started the book with some practical work, all up to the couple of the previous chapters, where we’ve “filled in some blanks” with some theoretical background.
Now we’ll build a nice project that we can call our own.
The project is the simplest possible todo app in React. We’ll make it as simple as they come.
However, through the building of this app, we’ll practice all the things we’ve learned so far, which will have a double effect:
- first, we’ll complete a simple, but working app in React
- second, we’ll reinforce the things we’ve learned in previous chapters
Note that throughout this chapter, we’ll be using Codepen to build our app. In the next chapter, we’ll build it again, only locally.
Let’s get started!
Table of contents
- Add the app component with basic static structure
- Get the initial state dynamically using the useState React hook
- Convert the HTML form element to a separate functional component
- Extract the state data to a separate component
- Handle submit events on the form
- Validate that the form input isn’t blank
- Get the value of user input and store it in the TodoInput component’s state variable
- Update the todos state with user-provided input
- Add the done button on each of the todo items
- Add the styling on the todos that are done
- Add the delete todo functionality
- Make the input text reset after a newly added todo
- Make the buttons not lose opacity on the Done toggle
- Make the Done button’s text value update based on the state of the todo item
Add the App component with basic static structure
In the very beginning of the development of our todo app, it will consist of two parts:
- The list of existing todos
- The input to add new todos
To begin with, let’s just hardcode these, as follows:
const App = () => {
  return (
    <div className="app">
      <div className="todo-app">
        <ul className="current-todos">
          <li>Go shopping</li>
          <li>Wash dishes</li>
        </ul>
        <form>
          <input className="add-todo" type="text" />
        </form>
      </div>
    </div>
  );
};

ReactDOM.render(<App />, document.getElementById("root"));
This first version of the todo app is saved as a Codepen titled React todo, pt 1.
Our app is as simple as can be at this point:

Get the initial state dynamically using the useState React hook
We start by destructuring the useState hook from React:
const { useState } = React;
Using useState we set the state in the todos const, and the method to update it as setTodos:
const [todos, setTodos] = useState([
  { text: "Go shopping" },
  { text: "Wash dishes" }
]);
Let’s quickly revise how the useState and the array destructuring works in the code above.
Basically, the above code is the same as this:
const data = [
  { text: "Go shoping" },
  { text: "Wash dishes" }
];
const initialTodosState = useState(data)
const todos = initialTodosState[0];
const setTodos = initialTodosState[1];
Writing it using array destructuring is just a nicer way to deal with things here. That’s all there is to it.
Next, we loop over the data stored in the todos const in the return statement:
{todos.map((todo,index) => (
  <Todo key="index" todo={todo} />
))}
And we add a new Todo component to make everything work:
const Todo = (props) => {
  return (
    <li>
      {props.todo.text}
    </li>
  )
}
After the above updates, our app still looks exactly the same as before.
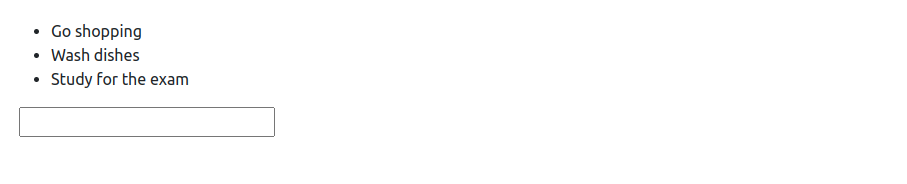
However, now we can add as many li elements as we’d like, dynamically, by updating the array we pass to the useState() method call. For example:
const [todos, setTodos] = useState([
  { text: "Go shopping" },
  { text: "Wash dishes" },
  { text: "Study for the exam" }
]);
The changes to the passed-in array now appear in the browser.
Wonderful! We’re now getting the state dynamically, using the useState React hook.
This improvement is saved as a Codepen titled React todo, pt 2
Next, let’s add the functionality to add state.
Convert the HTML form element to a separate functional component
Let’s now update our static form input, which currently is just some plain HTML:
<form>
  <input class="add-todo" type="text" />
</form>
Above the App component, let’s add a new functional component:
const TodoInput = () => {
  return (
    <form>
      <input disabled className="add-todo" type="text" />
    </form>
  )
}
And now let’s use the TodoInput component inside the App component:
const App = () => {
  // ... useState section skipped for brevity ...
    return (
    <div className="app">
      <div class="todo-app">
        <ul class="current-todos">
          {todos.map((todo,index) => (
            <Todo key="index" todo={todo} />
          ))}
        </ul>
        <TodoInput />
      </div>
    </div>
  );
};
Note the addition of the disabled keyword here:
<input disabled className="add-todo" type="text" />
This was done so that our app plays nice at this point of its development.
The current update to our app is saved as a Codepen titled React todo, pt 3
Extract the state data to a separate component
While we’re in the part 3 of our React todo app development, there’s another little thing we can do, and that is: we’ll extract the array of objects holding the initial state. We’ll save this extracted array in a variable aptly named data.
Here’s the updated App component where all of this is happening:
const App = () => {
  const data = [
    { text: "Go shopping" },
    { text: "Wash dishes" },
    { text: "Study for the exam" }
  ]

  const [todos, setTodos] = useState(data);

  return (
    <div className="app">
      <div className="todo-app">
        <ul className="current-todos">
          {todos.map((todo,index) => (
            <Todo key={index} todo={todo} />
          ))}
        </ul>
        <TodoInput />
      </div>
    </div>
  );
};
The above update makes for a bit more readable (understandable) code, with a cleaned up line where we’re using the useState:
const [todos, setTodos] = useState(data);
Next, we’ll handle submit events on our app’s form.
Handle submit events on the form
To do this, we’ll need to update the TodoInput component. Specifically, we’ll bind the onSubmit event to an event-handler function.
const TodoInput = () => {
  return (
    <form onSubmit={handleSubmit} >
      <input class="add-todo" type="text" />
    </form>
  )
}
Obviously, we now need to define the handleSubmit function in our TodoInput component:
const TodoInput = () => {

  const handleSubmit = evt => {
    evt.preventDefault();
    alert('Adding new todo');
  }

  return (
    <form onSubmit={handleSubmit} >
      <input class="add-todo" type="text" />
    </form>
  )
}
For now, we’re just alerting the string Adding new todo. That’s how we’re currently “handling” the submit event.
To improve our event handling, we need to do two things:
- Check that the value that’s passed in is not an empty string. If it is an empty string, we’ll warn the user about a non-valid entry.
- If the passed-in value is a regular string, we’ll need to add it to the array of
todos.Validate that the form input isn’t blank
Let’s tackle the empty string validation first:
const TodoInput = () => {
  const [ userInput, setUserInput ] = useState("");

  const handleSubmit = evt => {
    evt.preventDefault();
    if (!userInput) alert("You need to type something!")
  }

  return (
    <form onSubmit={handleSubmit} >
      <input className="add-todo" type="text" />
    </form>
  )
}
We’re again using the useState hook - this time to work with state in the TodoInput component.
For now, we’re using the useState hook to populate the value of userInput so as to be able to validate if it’s truthy or falsy.
If it’s falsy, we’re alerting the user with a warning message, which takes care of our very basic validation.
Get the value of user input and store it in the TodoInput component’s state variable
Since we’ve added the ability to work with state, we can now get the state out of the input form when the user types into it.
Here’s a very basic way to get the value that the user inputs:
const TodoInput = () => {
  const [ userInput, setUserInput ] = useState("");

  const handleSubmit = evt => {
    evt.preventDefault();
    if (!userInput) {
      alert("You need to type something!");
      return;
    }
    alert(userInput)
  }

  return (
    <form onSubmit={handleSubmit} >
      <input
        className="add-todo"
        type="text"
        value={userInput}
        onChange={ evt => setUserInput(evt.target.value) }
      />
    </form>
  )
}
What we’re doing above is: we’re alerting the userInput value, but only after we’ve checked that it isn’t falsy - if it is falsy, we alert the warning and return from the function immediately.
Inside the input, we’re adding an onChange JSX attribute, and we’re passing it a callback function which will get called when the value of the input changes.
We’ve setting the user-provided value of the input element to the userInput variable.
So, we’re getting the onChange event’s evt object in the callback, and we’re using the target.value on the evt object to set the value on userInput variable - using the setUserInput (which we’ve previously destructured from the useState() method call).
This improved version is saved as a Codepen titled React todo, pt 4.
Update the todos state with user-provided input
We’re now ready to update the state of our todos variable, which we’ve previously destructured from the useState array.
Coming from the JavaScript land, we might think of using todos.push() and then just push the string that the user typed into the form, but this won’t work as we’d like, because React wouldn’t get notified of the update to the todos array - thus making this kind of update sort of useless.
Instead, we’ll use the setTodos() function - this is the correct way to update our code, because we’re using the useState() hook.
The syntax for this update works like this: instead of todos.push( // whatever goes here ), we’ll do this:
setTodos([...todos, { userInput }]);
To understand how the above syntax works, we need to step back and re-visit some code in the JavaScript language.
Consider the following code:
let arr = [1,2,3];
arr = [...arr, 4]; // --> returns: [1,2,3,4]
Alright, so this is pretty straightforward.
However, our example’s syntax looks like this:
setTodos([...todos, { userInput }]);
What’s with this { userInput } syntax?
It’s just a way to add another object.
For this, we’ll have to look at another JS snippet:
let todos = [
  { text: "a" },
  { text: "b" }
]
const userInput = "c";
todos = [...todos, { userInput }];
todos; // --> [{ text: 'a'}, { text: 'b' }, { userInput: 'c' }]
Note: The third object inside the above example’s todos array is:
{ userInput: 'c' }
This will be very important a bit later, so keep it in mind.
Now that we understand the setTodos([...todos, { userInput }]) line, we’re a step closer to understanding the updates we’ll make in this section.
Let’s inspect the entire app as it was in version 4, but this time we’ll also comment the places where we’ll add updates and the logic behind it.
Here’s the v4 of our app, with relevant comments where we’ll be adding changes:
const { useState } = React;

const Todo = (props) => {
  return (
    <li>
      {props.todo.text}
    </li>
  )
}

const TodoInput = () => { // we need access to todos and setTodos state here (1)
  const [ userInput, setUserInput ] = useState("");
  // we'll log out the todos here, as a sanity check (2)
  const handleSubmit = evt => {
    evt.preventDefault();
    if (!userInput) {
      alert("You need to type something!");
      return;
    }
    alert(userInput); // we'll replace it with console.log - it's better UX (3)
    // we'll assign userInput to text (4)
    // we'll call setTodos() and pass in the ...todos, and { text } (5)
  }

  return (
    <form onSubmit={handleSubmit} >
      <input
        className="add-todo"
        type="text"
        value={userInput}
        onChange={ evt => setUserInput(evt.target.value) }
      />
    </form>
  )
}

const App = () => {
  const data = [
    { text: "Go shopping" },
    { text: "Wash dishes" },
    { text: "Study for the exam" }
  ]

  const [todos, setTodos] = useState(data);

  return (
    <div className="app">
      <div className="todo-app">
        <ul className="current-todos">
          {todos.map((todo,index) => (
            <Todo key={index} todo={todo} />
          ))}
        </ul>
        <TodoInput />{ /* we'll pass state props to this component (6) */ }
      </div>
    </div>
  );
};

ReactDOM.render(<App />, document.getElementById("root"));
There you have it, our work is now cut out for us. Here’s an overview of the updates that we need to make:
- We need access to
todosandsetTodosstate here - we can simply pass it and destructure the props object on the spot, using this syntax:{ todos, setTodos }. - We’ll log out
todosso that we can inspect what is going on in our console. Alternatively, we can use React devtools, but the console will suffice for our modest needs. - The
alert(userInput);line is really annoying, so let’s move this output to the console by replacing this line withconsole.log(userInput). - Here we’ll need to assign whatever is inside
userInputtotext, so that we can… - Call
setTodos()and pass it the updated array of[...todos,{ text }] - The
<TodoInput />component must receive props fortodosandsetTodos, so we’ll add it the necessary attributes.
After we’ve planned our updates and described the reasoning behind it, we can code a new version of our app. Here’s the full code:
const { useState } = React;

const Todo = (props) => {
  return (
    <li>
      {props.todo.text}
    </li>
  )
}

const TodoInput = ({setTodos, todos}) => {
  const [ userInput, setUserInput ] = useState("");
  console.log(todos);
  const handleSubmit = evt => {
    evt.preventDefault();
    if (!userInput) {
      alert("You need to type something!");
      return;
    }
    console.log(userInput);
    let text = userInput;
    setTodos([...todos, { text }]);
  }

  return (
    <form onSubmit={handleSubmit} >
      <input
        className="add-todo"
        type="text"
        value={userInput}
        onChange={ evt => setUserInput(evt.target.value) }
      />
    </form>
  )
}

const App = () => {
  const data = [
    { text: "Go shopping" },
    { text: "Wash dishes" },
    { text: "Study for the exam" }
  ]

  const [todos, setTodos] = useState(data);

  return (
    <div className="app">
      <div className="todo-app">
        <ul className="current-todos">
          {todos.map((todo,index) => (
            <Todo key={index} todo={todo} />
          ))}
        </ul>
        <TodoInput setTodos={setTodos} todos={todos} />
      </div>
    </div>
  );
};

ReactDOM.render(<App />, document.getElementById("root"));
This update allows us to have the user type into the input field and have a new todo appear in the list of todos.
This improved version is saved as a Codepen titled React todo, pt 5.
Next, we’ll add the done button on each of the todo items.
Add the done button on each of the todo items
Let’s start off with a simple update to the Todo component:
const Todo = (props) => {
  return (
    <li>
      {props.todo.text}
      <button onClick={() => console.log('clicked') } >
        Done
      </button>
    </li>
  )
}
We’ve added a button element with the onClick Synthetic event, which simply logs out clicked whenever any of the li element’s buttons is pressed.
Let’s now extract the above anonymous callback function into a separate named function.
We’ll name it markTodoDone:
const Todo = (props) => {

  const markTodoDone = () => {
    console.log('clicked');
  }

  return (
    <li>
      {props.todo.text}
      <button onClick={markTodoDone(index)} >
        Done
      </button>
    </li>
  )
}
Everything still works the same.
Let’s now pass to the markTodoDone the index of the actual li whose Done button we’re clicking. In order to do that, we actually need to “go up” a level - we’re no longer “looking” at our app from the viewpoint of a single todo, but rather from the point of the parent component. The parent component for the Todo component is the App component, and thus we need to update our app component as follows:
const App = () => {
  const data = [
    // ... code skipped for brevity ...
  ]

  const [todos, setTodos] = useState(data);

  const markTodoDone = index => {
    console.log(index);
  }

  return (
    <div className="app">
      <div className="todo-app">
        <ul className="current-todos">
          {todos.map((todo,index) => (
            <Todo key={index} index={index} todo={todo} markTodoDone={markTodoDone} />
          ))}
        </ul>
        <TodoInput setTodos={setTodos} todos={todos} />
      </div>
    </div>
  );
};
This change is that basically, we’re defining the markTodoDone() function in App, rather than in the Todo component.
Additionally, we need to pass the index prop to the Todo component, like this:
const Todo = (props) => {
  console.table(props);
  return (
    <li>
      {props.todo.text}
      <button onClick={() => props.markTodoDone(props.index)} >
        Done
      </button>
    </li>
  )
}
In the above update to the Todo component, we see that the props object has the todo object as its property, and the todo object has the text propery. This is what is being set as the text node of the li element.
Furthermore, the onClick syntethic event uses an anonymous callback, which gets no parameters, but does call the props.markTodoDone() from the parent App component. The props.markTodoDone() accepts the props.index parameter.
Obviously, in order to use the index, we need to pass it inside the App component, and thus we have the following line of code:
<Todo key={index} index={index} todo={todo} markTodoDone={markTodoDone} />
After all these updates, when a user clicks on any of the Done buttons, the index of that li element gets console logged.
Our todo app is now titled React todo, pt 6 on Codepen.
Add the styling on the todos that are done
Next, we’ll update the style on each todo so that it has a lower opacity.
The aim is to update each of our todo li elements’ styles when their Done button is clicked, as follows:
style="opacity: 0.4"
To achieve this, we’ll use the following syntax on our Todo component:
<li style={{ opacity: props.todo.isDone ? "0.4" : "1" }}>
 <!-- ... code skipped for brevity ... -->
</li>
Basically, what we’re doing above is: we’re checking if the isDone property on each of the todo objects in our state is set to true or false. If the isDone property is true, we add the value of 0.4 on the opacity style, otherwise we set the value of opacity to 1 (which is the browser’s default style).
However, to make this work, we need to update our initial todos state, stored in the data variable in the App component:
const data = [
  { text: "Go shopping", isDone: false },
  { text: "Wash dishes", isDone: false },
  { text: "Study for the exam", isDone: false }
]
Now that we’ve added another property to the data model, we need to update our markTodoDone method, as follows:
const markTodoDone = index => {
  console.log(index);
  const updatedTodos = [...todos];
  updatedTodos[index].isDone = !updatedTodos[index].isDone;
  setTodos(updatedTodos);
}
After this update, we can toggle a todo being in the “Done” state, which is confirmed through a change in opacity on a clicked todo item.
This update is saved on Codepen as React todo, pt 7.
Add the delete todo functionality
Next, we’ll add a way to delete todos.
Before we do that, and based on the things we’ve learned so far, here’s how that would work:
- First, inside the
Appcomponent’s return statement, in the section where we’re mapping over thetodosdata, inside the looped-overTodocomponent, we’ll add another prop with which we’ll pass the data to the actualTodocomponent’s template. Effectively, we’re adding another entry to thepropsobject that theTodocomponent will receive from its parent component (App). - On the side of the functional
Todocomponent, we’re still just receiving a single object,props, but now we know that thispropsobject has another property - the property which will allow us to remove a todo. We’ll name this propertydeleteTodo. Thus, in the return statement of theTodofunctional component, we’ll need to add another button, with the text “delete”, and we’ll use theonClicksynthetic event to call an anonymous function which receives no arguments but does call thedeleteTodofunction, and accepts a single parameter: theindexof the todo to be deleted. - Back inside the
Appcomponent, we need to define thedeleteTodo()method, which, just like themarkTodoDone(), will accept theindex, build a new array from thetodosarray, and delete the todo with a givenindexfrom itself. Then we’ll need tosetTodoswith the updatedtodosarray value.
After this in-depth explanation, let’s now reiterate, with an abbreviated explanation of the updates:
- In
App, inTodo, pass a prop nameddeleteTodo, and give it the value ofdeleteTodo. - In
Todocomponent’sreturn, add a button withonClickwhich calls thedeleteTodo(index). - In
App, define a new function,deleteTodo, pass it theindex, update the existingtodosto a new one, delete theindexposition in thetodosarray, and return the updated array using thesetTodosuseState’s update method.
That’s all there is to it!
Here’s the relevant part of the update in App component’s return statement:
{todos.map((todo,index) => (
  <Todo
    key={index}
    index={index}
    todo={todo}
    markTodoDone={markTodoDone}
    deleteTodo={deleteTodo}
  />
))}
Here’s the relevant part of the update in Todo component’s return statement:
return (
  ...
    <button onClick={() => props.deleteTodo(props.index)} >
      Delete
    </button>
  </li>
)
And here’s the new deleteTodo in App:
const deleteTodo = index => {
  console.log(index);
  const updatedTodos = [...todos];
  updatedTodos.splice(index, 1);
  setTodos(updatedTodos);
}
This update is saved on Codepen as React todo, pt 8.
This completes the basic functionality of our very simple todo app in React.
It’s always possible to make things even better, and in the next section, we’ll improve a couple of minor tweaks:
- Make the text in the input disappear after the addition of the new todo (currently, it lingers inside the input)
- Make the “Done” and “Delete” buttons not lose opacity on the Done toggle.
- Make the “Done” button’s text toggle between “Done” and “Todo”
Make the input text reset after a newly added todo
This one is really easy to fix. At the very bottom of the handleSubmit method of the TodoInput component, we’ll just add one more line that reads:
setUserInput("");
Since we’re tracking the user input’s state using the useState hook in the TodoInput method, that’s all that we need to do to make that pesky piece of text disappear.
Make the buttons not lose opacity on the Done toggle
This update is also pretty easy; all we need to do is reorganize where the styles appear in the return statement of the Todo component. Specifically, this means that we need to move the styles from the li into a new span element, which now wraps the {props.todo.text} string:
<span style={{ opacity: props.todo.isDone ? "0.4" : "1" }}>
  {props.todo.text}
</span>
Make the Done button’s text value update based on the state of the todo item
To do this, we’ll need to remind ourselves of how fragments work in React.
So, our plan is to use a ternary statement which checks whether the value of the props.todo.isDone is true or false, and use one or the other fragment accordingly.
Actually, it’s even simpler: since all we want to do is show either the words “Done” or “To do”, we can fit everything inside a neat little ternary statement:
{ props.todo.isDone ? "Done" : "Todo"}
That’s it, we’ve completed our three simple tweaks.
They are saved in a new version of our app titled React todo, pt 9.
This completes our chapter on building a Todo app in React on Codepen.
In the next chapter, we’ll repeat this process, only locally.
Additionally, we’ll use the things we’ve learned in this chapter and the previous ones, to have a more structured approach to building the todo app, with the aim to hopefully reinforce learning.

